- Click To to locate the email address of the recipient. The Recipients Browser opens.
- Choose an address from the Available list, then click > to add it to the To field. If you do not see the email address you want to send the dossier to, you can specify a new email address. Perform the following steps:
- Type a name for the email address in the Address Name field.
- Type the email address in the Physical Address field.
From the Device drop-down list, select the email client type of the email address.
Click Add to Recipients.
- Click OK to return to the Send Now dialog box.
- To display the dossier in the email, select Data in email. The dossier is displayed in the email, but is not delivered to the History List.
- To display the dossier in the email and deliver the dossier to the History List, select Data in email and to History List. No link to the dossier is provided in the email.
- To display the dossier in the email, deliver the dossier to the History List, and provide a link to the History List location of the dossier in the email, select Data and link to History List in email.
- To deliver the dossier to the History List, and provide a link to the location of the dossier in the History List in the email, select Link to History List in email.The dossier is not displayed in the email.
- To deliver the dossier as an HTML file, select HTML.
- To deliver the dossier as a PDF file, select PDF. The dossier is included as an attachment in the email.
- To reduce attachment size, select the Compress Contents checkbox, which creates a zip file.
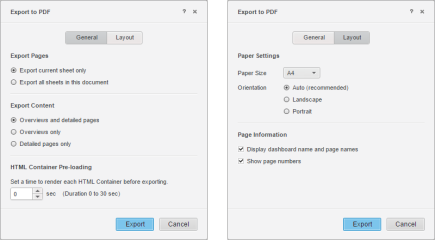
- To select formatting options, click the PDF Settings button.
- To deliver the dossier as an interactive file, select MSTR.The dossier is included as an attachment in the email and can be opened in Presentation mode. Note that files will not be sent under the following circumstances:
- The file is too large. (The maximum file size of the file is governed by the file size" field.
- The cube associated with the file is too large. (The maximum cube size is set by the "Maximum cube size allowed for download" field.
- Users with security filters subscribing to a Visual Insight dossier built on a cube
- Users with ACL restrictions on objects with Visual Insight dossiers built on a cube
 next to the File Name field.
- To protect the zip file by providing a password, select the Password Protect Zip File check box, then type a password for the zip file in the field.
- Type the name for the zip file in the Zip File Name field.
